Category: Supplies

Thank you for stopping in

The Fresh Art Studio Tour was great fun—as usual. Conversations with stimulating guests were abundant as was enjoying the artful surroundings of site 12, with its ceramics and paintings by Kaye, raku by Mark, jewelry by Pat, gardens, guinea hens, chickens, my nature prints, and very wet grass + mud. During the 24 hours between Friday and Saturday afternoon, we received 5.5″ of rain.

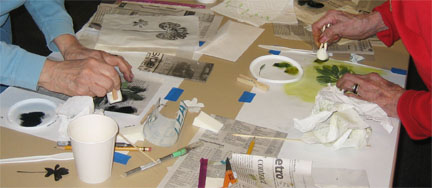
If you’re a printmaker, you know that humid weather keeps the ink “open” and the paper damp, making last weekend ideal for printmaking. As guests strolled through Kaye’s studio, I kept printing. You may have joined in the fun and made a print to take home.

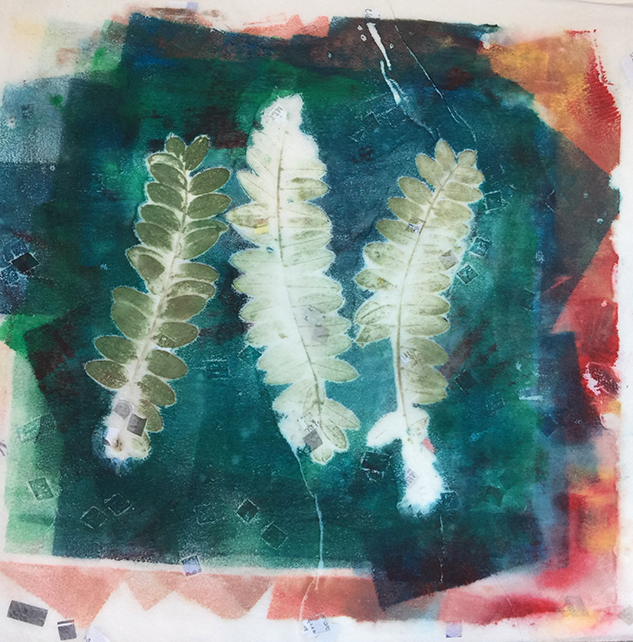
The print below shows three leaves from the prairie plant Leadplant (Amorpha canescens). One guest used red and gold ink; the next guest wanted a cooler palette of green, turquoise, and blue ink. I seldom clean the freezer-paper palette between guests, due partly to laziness but mainly because it’s exciting to see what the results may be when working with the colors and patterns left on the palette. Sometimes I refer to these as “residual” prints, honoring the “remains” left by previous printers. To the inky palette, I inked and added the three leaves.

A “residual” print of Leadplant leaves on a colorful inked palette.

I will give this print to dear friends Lynn and Wayne, whose 40th wedding anniversary was the day after they watched this print being pulled from the inky palette. You may be wondering what the small floating squares are in the background of the print. They’re in the paper, a sheet called Bangkok News, an affordable Oriental paper I purchase at Wet Paint, of course.

If you plan to take up the artistic sport of nature printing, Wet Paint has all of the supplies. Stop in to their shop on Grand Avenue in St. Paul, Minnesota, or contact them to fill a mail order for these simple, affordable supplies:

• 2” Speedball soft-rubber brayer
• Speedball water-soluble printmaking inks: black, red, yellow, blue, and green. If your budget can manage it, also purchase the colors dark yellow and turquoise. These provide unexpected influences when you mix them with the primary colors—or each other!
• A plastic palette knife (or use a plastic picnic knife)
• A roll of Sparkle Gold Oriental paper, 13” wide by 10’ (10 sheets per package)

You will also need a palette for rolling out your ink and applying it to your leaves. You can use the shiny side of Reynolds-brand freezer paper, a piece of Plexiglas or window glass (with the edges taped for safety), or a sheet of 18”x12” quilter’s Mylar.

After you get your supplies arranged, your paper dampened, and your leaves selected, be sure to have fun! I know you will.
 

Discoveries

Often during a class or demonstration, I’ll remind people to place the inky brayer on its stand or to keep track of which side of the paper is the right side. It’s easy to become absorbed in the printmaking process; to get excited about the possibilities of color and pattern and lose track of things.

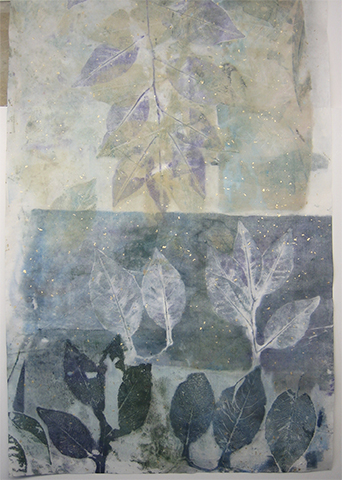
Well that happened to me last night. I was intrigued by the patterns that developed on my palette and decided to make those patterns part of the print of a twig from a tart cherry tree. In the process, I printed some images on the front side of the paper and some on the back. I know better, and the front was easy to determine because of the specks of gold leaf in the Sprinkle Gold paper from Wet Paint. Because the paper is somewhat translucent, this type of error can occur, although it may not be an error at all—simply a new way of looking at a familiar situation.

And as I looked at the print, and emailed the image to my teacher, she raised the question of whether the print is most appropriately viewed vertically or horizontally. What do you think?

The “right” side of a print of a tart cherry tree twig on Sprinkle Gold paper.

The print’s “wrong” side, shown in a horizontal orientation.

Nature printing and calligraphy

Recently 15 members and friends of the Colleagues of Calligraphy http://www.colleaguesofcalligraphy.com/ learned to print blossoms and delicate specimens. We printed the top side of pressed bloodroot flowers (that were reinforced with contact paper) by applying oil paints with a cosmetic-sponge dauber.

We also printed sage, Italian parsley, radishes, and hosta leaves on 90-pound dampened Arches Text Wove paper. Everyone seemed to have fun and made some wonderful prints.

Vocabulary word:
Avuncular—kindly, congenial, benevolent

Sharing nature printing at a demo

I had such fun demonstrating nature printing last night during an open house at what will become, following renovations, the new permanent home for the White Bear Center for the Arts (WBCA). http://whitebeararts.org/ The staff, board of directors, volunteers, members, and community are collaborating with great vision, energy, and generosity to enable more people to “…celebrate the joys of art”—one of the goals of WBCA.

Guests were so interested in the shapes and patterns that were created by the inked leaves, observing beauty they hadn’t really seen before. Danielle Cézanne, WBCA education director, and I hope to offer a nature printing class in winter or spring 2012, so please watch class listings.

The Nature Printing Society (NPS) http://www.natureprintingsociety.info/ is the best source for information about printing plants, and fish, shells, insects, and many other natural specimens. And the book I recommend was co-authored by my teacher, Sonja Larsen, and John Doughty, both of whom are lifetime members of the NPS. http://www.natureprintingbook.com/

In response to the terrific questions that were raised in our conversations last night, a few responses are below.

Yes, I make numerous prints from the same leaf—until I’m no longer happy with the prints. Some leaves are tender; many are quite durable, particularly tree leaves.

The supplies used in the demo were all from Wet Paint, where I purchase all of my supplies, which, by the way are minimal and affordable. http://www.wetpaintart.com/

• Speedball water-soluble block printing inks (You may also use oil-based inks or paints. Oil-based media can be cleaned with vegetable oil rather than solvents.)

• Speedball soft-rubber brayer (used to apply ink to the leaf)

• Paper: Sumi-E from a pad or Masa that comes in a flat sheet measuring 21×31 inches (dampen the paper and print on the top, or smoother side, of the sheet)

• Freezer paper, or a piece of quilter’s mylar (12×18 inches from Joann), Plexiglas, or window glass for a palette

I will be demonstrating nature printing the weekend of Oct. 7-9, 2011, as a guest artist at site #12 at the Fresh Art tour in colorful, scenic western Wisconsin where leaf color will be glorious. I hope to see you there!  http://www.freshart.org/

Printing a maple leaf

Excited about acrylic paints

I attended a free 2-hour seminar last Sunday at the White Bear Center for the Arts on using acrylic paints, gels, mediums, etc. The terrific instructor, Bonnie Cutts, was a “working artist”, a consultant trained & paid by Golden Artists Colors, Inc. The company has a lot of info on their website, including videos, for learning how to use their products.

I don’t intend to become a painter (I’ve got enough distractions & diversions already!), but the creative possibilities with acrylic media are inviting & intriguing. One can tint the acrylic medium to create subtle, colorful built-up layers; fasten materials to a collage; make an acrylic skin and print on it with an inkjet printer; and much more!

On the way home, I stopped at Wet Paint to get some papers for the upcoming nature printing class at White Bear Center for the Arts Sat., Sept. 25. As I was telling Langen, one of the knowledgeable, personable members of the Wet Paint staff about the uplifting experience I’d just had, Langen told me that all of the Golden products are on sale at a 40% discount through the end of September!! Naturally I purchased some and plan to test them for printing leaves, intending to work acrylics into the class curriculum. Isn’t life exciting?!

WordPress Themes